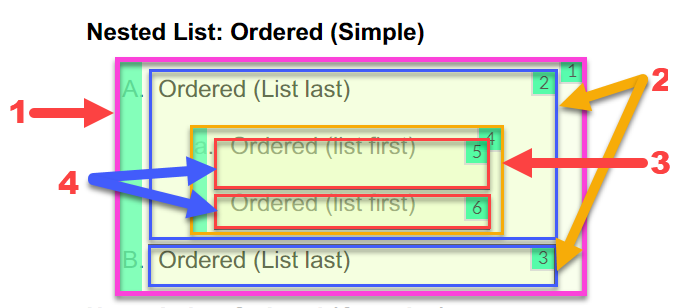
For nested Lists, first, draw a Zone around the entire contents of the List and choose List (Arrow 1) from the Zone Type dropdown list under Zone Properties in the Zone Tab. You will choose ordered or unordered and complete the details for any ordered items. Then press the Detect button. Equidox will draw zones around the list items (Arrow 2). Next, move the List Zone (Arrow 1) away from the List items (Arrow 2) so that the nested part of the List is exposed. Move the Zone which has been drawn around the List item which contains the nested elements (Arrow 2). Next, draw a new Zone around the nested items, Then choose List (Arrow 3) from the list of types under Zone Properties in the Zone Tab. Choose ordered or unordered, and press Detect. Equidox will create the zones around the nested list items (Arrow 4). Now return to the list item Zone for the item to which your nested list belongs (Arrow 3). Move and adjust this list item Zone so that it encompasses the text for both the parent list item AND the nested list. Then select the original list Zone (Arrow 1) and move and adjust it so that it surrounds your entire list. You can then check that your List is nested properly by choosing the Preview button, which will show your nested list items with bullets or numbers in a new window in HTML format. This can be done for any number or level of nested items. You must ensure that your nested list and the text for the list item which contains it are both completely surrounded by the zone for the parent list item.
Equidox Training - Lists video.