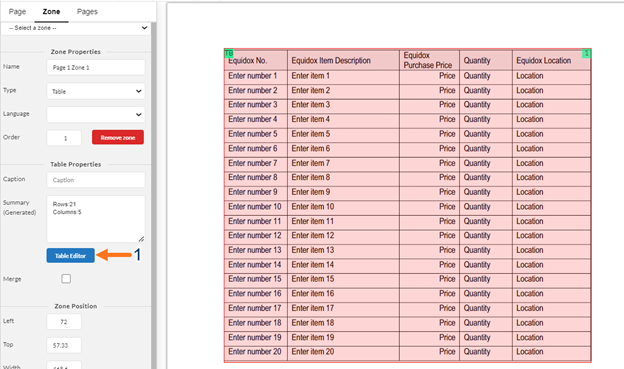
First draw a zone around the table and make it a table zone. Once this is done, the table editor option will appear (Arrow 1). Click the Table Editor button or double click the table to enter table editor mode.
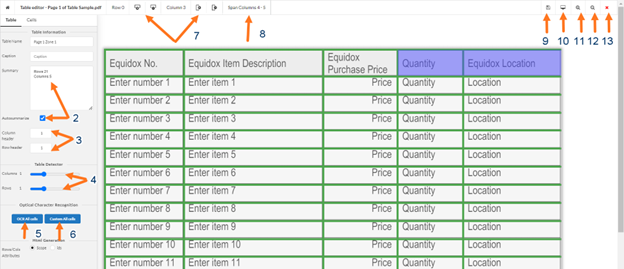
Once in the Table Editor, there are a variety of options to identify and tag the events of the table. First,click the Autosummarize checkbox (Arrow 2). This will allow the end user to know how many rows, columns and row/column headers are in the table and will autofill this information. Adjust the Row and Column Detectors (Arrows 4) until Equidox’ machine learning creates the appropriate amount of rows and columns. Add rows and/or columns using the plus and minus signs at the top (Arrows 7). If the table has multiple row/column headers, manually set these using the respective fields (Arrows 3). If the document is a scanned document where the text is not recognized, use the OCR All Cells button (Arrow 5) or the Custom All Cells button (Arrow 6).
To Combine cells if necessary first select at least two cells to span. Select the cells using Shift and the appropriate arrow key. Then click the Span button (Arrow 8) or press the “s” key Preview the table (Arrow 10), zoom in/out (Arrows 11 and 12) and exit (Arrow 13). Be sure to save any changes (Arrow 9).
Tables video.